· 3 min read

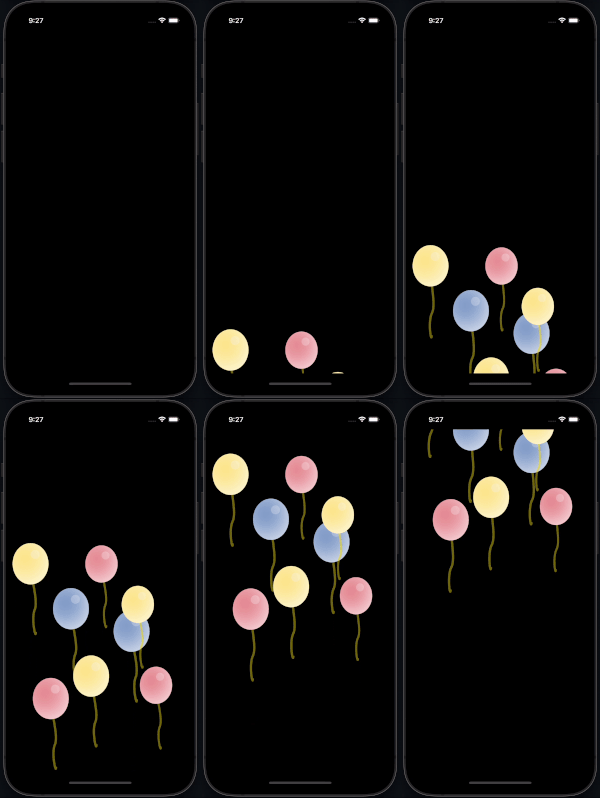
Animated balloons are a pretty attractive way of engaging with users. They can be used to attract user’s attention by congratulating them inside your app or by simply celebrating something, for instance. In this article, we will explore how to create animated balloons with React Native.

In the following sections, we will see how to use react-native-fiesta to add some animated balloons into your application with some few lines of code.

react-native-fiesta is a library that provides a set of celebration animations built with @shopify/react-native-skia. The nice thing about this is that Skia offers high-performance 2d graphics for React Native.

Installing Dependencies

The first step is installing react-native-fiesta package which provides us with all the necessary animations for our project. To do that, we need to install it by running the following command:

yarn add react-native-fiesta

react-native-fiesta fully depends on @shopify/react-native-skia so you have to package that one as well.c You can do it with the following command:

yarn add @shopify/react-native-skia && npx pod-install

After installation has been completed, we can use the library to add the animated balloons to our app.

Adding Animation Using Fiesta

To do that, we need to import the library in one of our components, we will use the App component as a base:

import React, from 'react'
import { Balloons } from 'react-native-fiesta'

After importing the Balloons from Fiesta, we can proceed to use them:

function App() {
return <Balloons />;
}

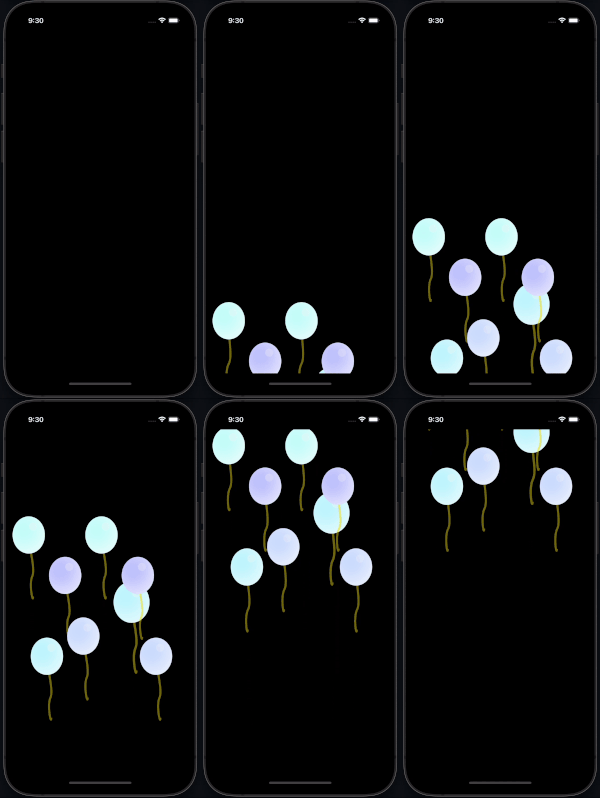
And that’s it, You have some animated balloons in your application. You can use them to celebrate a user’s birthday, a first purchase, a new goal achieved inside the app, or any other thing you might want to celebrate. The options are endless.

Balloons

Customising Fiesta Balloons

You can also customise the theming of the balloons. Let’s say you want to have a Colombian theme. You can do that by doing the following:

<Balloons theme={["#FCD116", "#003893", "#CE1126"]} />

That’s it!

Colombian Balloons

Fiesta also provides some other themes. You can use them just by importing them:

import { Balloons, FiestaThemes } from 'react-native-fiesta'


<Balloons theme={FiestaThemes.Neon} />

And then you will have some animated balloons with some neon colours.

Neon Balloons

Conclusion

In this post, we have taken a look at how add some animated balloons in React Native using react-native-fiesta. Now you can celebrate with your users and engage with them as never before.

You might be familiar on how Twitter celebrates a birthday in their platform. These balloons are inspired by that.

· 7 min read

In the last couple of years I have been able to travel to multiple countries thanks to programming and also thanks to some companies that have allowed me to work fully remote.

However, not always that I code I do it for companies, I do also enjoy doing some personal projects as well as open sourcing and contributing. That's why I have some fun while doing it, because of my side projects. Without them, there is no really much motivation to just work on your daily things.

Offline Work

Working offline can be benefitial if you are in places with really poor connection or also in case you are in a flight, a train without internet or in a ship in the middle of the ocean and you don't want to pay for internet there.

There are some projects that allow you to work fully offline. I'm not talking about projects company wise but about code projects.

If you have a project which you can fully install locally A.K.A a full-stack, db, server and front-end then you have gold there. Why? You would think this is not really nice, but whilst you are killing time somehow you gain some extra focus (perhaps that's only my case, but there is a change that it is for you too).

Being able to work offline has the advantage of being very productive whilst that's the only thing you can do. In my case because I mostly travel solo that works pretty well. Now, if you are with friends, couple or family, please try to enjoy with them too and don't go to travel just to code. Do it when they are resting or something, respect your company.

Disadvantages; not always is that nice if you are stuck with a bug and you need to search something. In that case being offline sucks because the first thing you want to do is checking Stack Overflow but because you are offline, it's most likely that you will get stuck. In that case, try to switch to something else if you can, or if you can't switch to something else, just go to another project either from your company or personal, open source, e.t.c...

Killing Time

Sometimes you are in places where you have everything you need to code and unfortunately you have to be there just waiting. A.K.A airports (most of the times).

If you are reading this you're quite lucky, coding at an airport is fun because you are still in mainland and you can get internet either from there or from your own, you can also charge your laptop, phones and whatever you need but most importantly, you can get some coffee and food, that's right, please grab something to eat before coding and get fully focused :)

Sometimes it is unfortunate and your flight can get delays. Lucky you, you had something to do so who cares, as long as the delay doesn't affect your final plans everything should be good, you just gained some productivity hours there.

Extra Focus

A clear example of extra focus is this, I wrote this in about an hour whilst travelling from Rhodes to Rotterdam in a 4h flight. Normally I can't write that fast and accurately because there are too many distractions.

I have found myself getting a lot of focus whilst I am killing time or offline, I can tell I am around %400 more productive compared to when I work from my home, and around %2000 compared to when I work on-site (I know right, working on-site sucks, I just go to say hi and hang out with colleagues a bit).

Maybe it is because you don't have distractions or maybe it is because you don't have anything else to do that you gain focus. Internet itself can distract you, you want to check social media, you want to check a song you remembered or you want to check how to be productive while travelling and coding, you see, so many distractions. I think one of the main focus reasons is not having internet.

Next to the not internet thing, when you are working online with your co-workers of course it can be very useful if you have to align tasks, coordinate things, help and unblock people but also becomes super distracting. Every time you get a message you lost some small focus, whilst if you are working offline you don't have that problem.

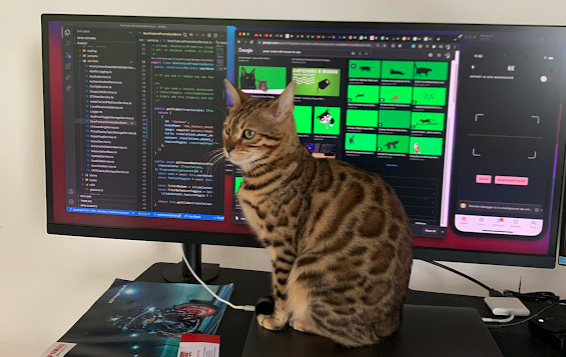
Photo of my biggest distraction when working from home:

Distraction

Bad Internet Connection

Sometimes or maybe most of the times you need internet to accomplish your tasks, have a call with your co-workers or just copy and paste from Stack Overflow. But it turns out that the hotel you booked has an internet connection shared for 300 guests lol. That's why if you want to get a bit of a better connection, just check the ratings of the hotel before hand regarding to that topic, or even better just get your own hostpot.

In case the above is not possible, you can also go to co-working spaces. Not something I've done so much myself because I don't like to get that feeling of working on-site while working remotely but it is a good option.

Poor Calls

Sometimes because of the bad internet connection, your calls will suck. You are in the middle of a standup and then it's your turn to give your update and you see all the faces frozen in the screen or they just say, "yo Mateo, we can't hear you (you poor, get a better hotel, we don't pay you enough or what)".

For this, you just have to be prepared before hand, if your team doesn't care that much about it then fine, but because normally they do and maybe you have multiple calls within the day, just try to get a better connection using the options mentioned in the bad internet connection section.

It is not nice to have poor calls, it can also be a bit unrespectful depending on which kind of call you have, so get that fixed.

Bad Desks

Oh yeah the most important one. Before you book a hotel, if you are going to be working from there for a couple of days please check that at least if has a desk and a normal chair. Once in Istanbul I was working in half a desk and sitting on the bed because there was no chair and I was there for 4 days. I managed but when I went back to the Netherlands I had a massive pain in my back which you should avoid at all costs if you are a developer.

Conclusion

Working while travelling is awesome, you get to know a lot of places you wouldn't go to if you were only using your holidays but at the same time you can also have the advantage of the extra focus as I described, which is I think beautiful when you want to accomplish something short-term.

Because all experiences are different, I would love to see my fellow traveller programmers commenting about this. Maybe you don't get that extra focus and maybe you hate to do it. In any case, thanks for reading my experience.

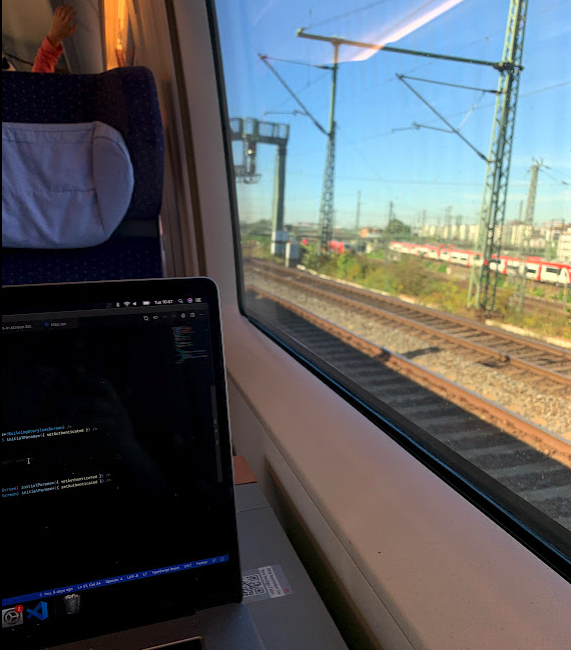
Below a photo working in one of my trips:

Working

· 9 min read

Recently I did some research and started working on a prototype for a personal idea I wanted to develop. I chose some tools accordingly for my needs and I would like to share my experience and what I like about this combo for a TypeScript developer.

Background

I wanted to build a cross-platform application, which includes a mobile application for iOS & Android, as well as a web application to reflect some of the core functionalities of the mobile app but in web.

Besides this, I also wanted to have an API which I could use for all my apps. And later on if the project starts getting some traction, I wanted this to be scalable.
Banner

Choosing the technologies: Starting with front-end

React Native

In this case, I am the developer. And as someone that is more focus on front-end, specially for mobile applications and working with React Native already for a couple of years, I know the advantages of this technology when it comes about creating something for iOS & Android in a faster and good way

Based on that, I choose React Native as my front-end framework.

React Native Web

Because I had seen react-native-web around for a while but had never used it before, I also decided to integrate it in my React Native project after doing some research. I saw a lot of reviews and specifically for the things I wanted to build (which was nothing too crazy) and it was a really good option.

When it comes about sharing code between web and mobile, I can say that about the 80% of my code is shared. The other 20% is adjusting the screens to be more web friendly, the navigation which is not that difficult to adjust and some small functionalities that I couldn’t make work that easily using React Native Web, e.g: Maps & Photo Uploader.

React Navigation

It is a very known library for mobile navigation for React Native, and also supports some things for React Native Web. For my application it worked really nice, again I remark that my application is fairly small and it is nothing too crazy. Maybe if it was too big, not sure how scalable would be sharing the routing across mobile and web.

Styled Components

Because the styles are written in a CSS way, it makes the styling easily shareable between mobile and web. And also the tool supports theming and other cool stuff which makes the development experience quite friendly.

For my case I am building right away dark and light mode so it was a must for me to have a theming since the beginning.

React Native Paper

Because I wanted to build a quick prototype, it didn’t matter that much if the styles weren’t that custom. React Native Paper provides a bunch of components that look nice, support accessibility and they are also responsive.

Funny enough, the theming is very similar to the React Navigation one so I designed a theming that could be easily shared between the app, navigation and paper.

Most of the components are also supported for React Native Web, which makes the development way faster because everything is already shared cross-platform.

Apollo Client | GraphQL

To connect the API with my front-end application I opted to use Apollo Client, it is also a very known tool and I also decided to work with this one because the back-end is also GraphQL.

Apollo Client helps the front-end to connect with GraphQL endpoints but also offers cache and other nice functionalities that I personally like. (global state management for example) You can read more about it here.

Next to this, I integrated a GraphQL code generator, which helps me autogenerating all the types based on the back-end schema. Together with GQLg, I also autogenerate mutations, queries and subscriptions based on the schema. Meaning that I don’t write anything in the front-end or the connection with the API since everything is autogenerated. This is my opinion accelerates my development a lot since I don’t have to worry about writing queries or mutations manually and I just consume the autogenerated resources.

i18n for internalisation

For the first version of the project I wanted it to have Spanish and English are those are the languages I can easily translate (and have a decent translation) and put them into the app.

i18n is a very nice framework for this.

https://www.i18next.com/

Back-end Technologies

As I haven’t done back-end for a while, I wanted to use something that is still more or less familiar for the things I do everyday, just because of simplicity and agility.

I got some inspiration from a friend that uses a similar stack and from a Ben’s Awad full-stack tutorial.

NestJS

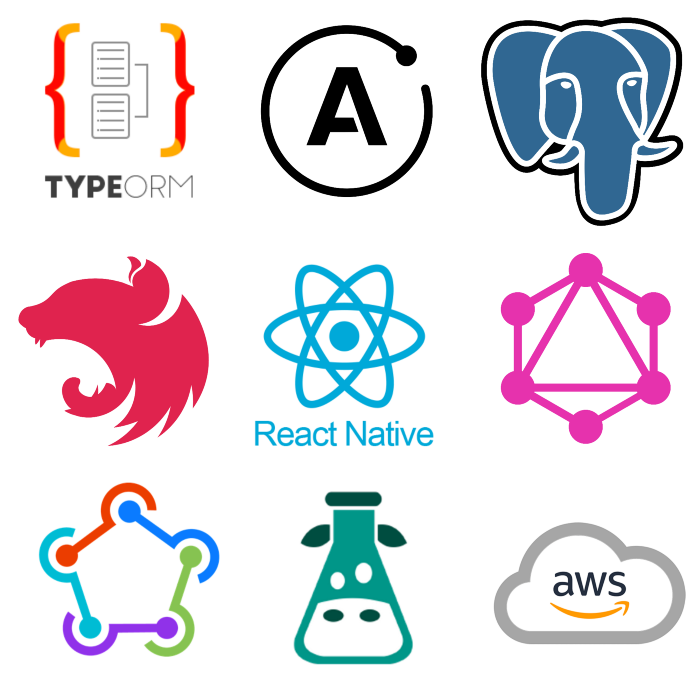
I just discovered it this year and why did I choose it? Because it has a big community, it is as a docs says “extensive, versatile & progressive”, but also it has support for all the technologies I will list down below.

https://nestjs.com/

TypeORM

Provides an excellent support to connect applications with any kind of database and it is very nice to use it when you like TypeScript.

https://typeorm.io/

Apollo Server | GraphQL

As I wanted to use GraphQL for both back-end and front-end, I had to use Apollo Server in order to provide the endpoints. It connects really well if you also use Apollo Client in the front-end, and as I’m working in both sides I am really familiar on how this works.

You can read about it here. It provides self-documentation and also you can have a playground which is really useful to test the API.

PostgreSQL

As PostgreSQL supports both SQL (relational) and JSON (non-relational) querying. I wanted to have this flexibility. Initially my models are relational but I might be experimenting with non-relational as well.

Also, it is a well known database and with NestJS works nicely.

Others

  • Fastlane: CI/CD for mobile applications.
  • Google Analytics: Statistics and analytical.
  • Sentry: Error tracking and monitoring.
  • Cloudinary: Cloud-based image and video management services.
  • AWS: I will be using the free tier initially to deploy my back-end and database.

Summary

Front-end:

React Native, React Native Web, React Navigation, Styled Components, React Native Paper, Apollo Client, GraphQL & i18n.

Back-end:

NestJS, TypeORM, Apollo Server, GraphQL & PostgreSQL.

Others:

Fastlane, Google Analytics & Sentry.

Learnings

My experience using this combination has been very nice. In case the project has success and it gains users, it will be very easy to scale since it uses good technologies and the architecture for the project is well organised. I will be writing about the architecture used for this project in another article.

I’m currently working full-time as a Mobile Developer with React Native but I also have some full-stack experience with Php & Node.js. It’s been easy to learn NestJS, as it is a Node.js framework and somehow it reminds me of Angular. As a non full-time back-end, I don’t have a broad knowledge about how to build a very scalable back-end but I feel that NestJS provides already a very organised architecture that makes the job easier as I don’t have to think much about folder/files structure. Because it also supports a lot of things out of the box, it makes it super easy to create a quick prototype and you don’t have to worry about so many things.

Because of the technologies, in case the project goes good I can also plan on getting investment moving forward, and because everything is scalable, it is also attractive technology wise for investors. And not only that, in case you want to have more people working with you when the project grows, it will be very easy to have more people working on it.

What’s next?

The first plan is to release the API to a container which I can access remotely and then I will be able to connect my application to the cloud.

After that, finish the first version of the app. I will be focused first on delivering to the store the iOS app because of the map functionality, it’s been easier than the Android one since I don’t have to do much configuration using Apple Maps.

Later on I will finish Android, finish the map which is going to be different to the iOS one (will use Google Maps) and also I will make sure some other functionalities there work smooth and the performance is good.

And then last but not least, I will fix the remaining styling differences, maps and photo upload functionality for the web. And then I will plan the first release of the web as well.

At that point of time I will have everything fully released, I will be doing some self-promotion on Facebook groups and other platforms. I will be probably focused on adding more analytics and more error tracking, in order to deliver a good experience and learn from the user’s behaviour.

...

Notice that I did not mention what the app is about here as it didn’t really matter for the purpose of this article, I just wanted to show the cool tools that are around in 2022 if you want to build your own prototype as a solo developer.

However, in a couple of months I would like to share my full experience about going live using these technologies, and I will be sharing what went well and what did not go that well after releasing the first version. And of course, I will share the published app.

Thanks for reading, let me know in the comments if you have another nice stack you have experimented with lately.

· 5 min read

Banner

If you are here, like me, you were searching for simple but nice solutions for state management for a small React Native application.

You may have considered using Redux or maybe Context. Well, those options work too but depending on your needs, it can get too robust or it won’t handle all the cases you need.

That’s why I experimented using Async Storage & React Query. It gives me persistence since I can close my app and the state will remain in the Async Storage, and also it will work as offline storage if that is something you need too.

Let’s start with the basics. What is Async Storage?

“AsyncStorage is an unencrypted, asynchronous, persistent, key-value storage system that is global to the app. It should be used instead of LocalStorage.” (https://reactnative.dev/docs/asyncstorage)

What is React Query?

“Fetch, cache and update data in your React and React Native applications all without touching any “global state” (https://react-query.tanstack.com/)

React Query allows us to cache our data in a very simple way.

Why this combination?

I wanted to keep the state of my applications persistent across different screens but I didn’t want to pass the state of the screens with props.

Also, I wanted to keep the information I had even after the user closed the app. So when the user opens it again, the information is there.

Other benefits?

Offline support. With this solution, you can also cache data and use it offline

Implementation

The application I built for this example, searches for books using OpenLibrary API, and then we have the ability to save these books in a wishlist or a reading group.

I won’t focus on the full implementation since you can find that in my repository. I want to explain here the logic for React Query + Async Storage.

Firstly, I created a service file called list.service.ts where I will put the get and the update logic.

We have a function, useGetList which will retrieve the items of the list saved on the local storage. At the same time, it will use the listKey to store this information in the cache using React Query. We use the same key for Async Storage and React Query to have the same reference.

import AsyncStorage from '@react-native-async-storage/async-storage'
import { useMutation, useQuery, useQueryClient } from 'react-query'

export enum List {
Wishlist = '@wishlist',
ReadingGroups = '@readingGroups'
}

export const useGetList = (listKey: List) => {
return useQuery<string[] | null, Error>(
listKey,
async () => {
const result: string | null = await AsyncStorage.getItem(listKey)

return result ? JSON.parse(result) : []
}
)
}

After this, we create a function called useUpdateList which will be the one in charge of updating the list in both local storage and cache.

Again, we use the listKey to make reference to the list.

/**
* Article: https://mateoguzmana.medium.com/persistent-state-management-using-async-storage-react-query-for-simple-react-native-apps-9206db073f4a
*/
import AsyncStorage from '@react-native-async-storage/async-storage'
import { useMutation, useQuery, useQueryClient } from 'react-query'
import { getUpdatedList } from '../utils/list.util'

export enum List {
Wishlist = '@wishlist',
ReadingGroups = '@readingGroups'
}

export const useGetList = (listKey: List) => {
return useQuery<string[] | null, Error>(
listKey,
async () => {
const result: string | null = await AsyncStorage.getItem(listKey)

return result ? JSON.parse(result) : []
}
)
}

export const useUpdatelist = (listKey: List) => {
const queryClient = useQueryClient()

return useMutation(
listKey,
async (itemId: string) => {
const result: string | null = await AsyncStorage.getItem(listKey)

const currentList = result ? JSON.parse(result) : []
const newList = getUpdatedList(currentList, itemId)

await AsyncStorage.setItem(listKey, JSON.stringify(newList))

return newList
},
{
onSuccess: () => queryClient.invalidateQueries(listKey),
}
)
}

It is important to notice that in line 37, on onSuccess we call the queryClient and then we invalidate the queries. What it does is invalidate the queries in all the places where you are using the queries for the specific list. That’s why it’s important to keep a consistent reference with the listKey.

Example of this:

Let’s say we have Screen A and Screen B. On screen B we press a button to save a book to the wishlist. We want Screen A to reflect these changes too.

Getting initial and updated list

On screen A, we can simply do this:

const { data: getWishlistData } = useGetList(List.Wishlist);

This is basically getting the wishlist, using the useGetList query. Once we invalidate this query, it will automatically fetch again this information, keeping an updated state of this list. Then the changes are reflected in both Screen A and B (because the query is used in both).

Updating lists

We can use useUpdateList to update a list from a component by simply doing:

const updateWishlist = useUpdatelist(List.Wishlist);
const onPressWishlistButton = () => updateWishlist.mutate(itemId);

This will save the data in both local storage and cache and then the queries listening to this listKey will be fetched again automatically without any extra effort.

...

The explanation of the full example is a bit difficult, I might have missed some things during the writing so that is why I suggest you go to the repository and read the full code and also look at the examples, it will make it easier to understand.

Please also notice this was experimentation and in my opinion, this works very nicely for small projects. If you are looking into complex state management I’d suggest another option like Redux.

Please check out the example app.

· 5 min read

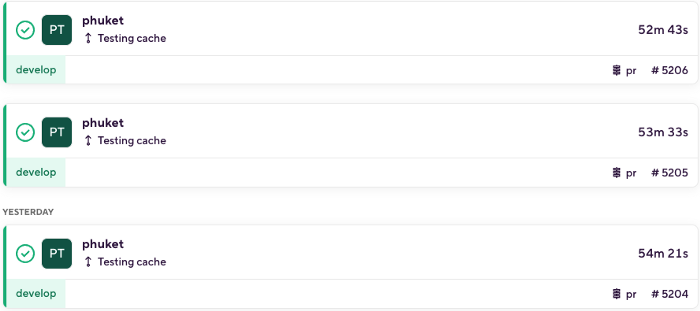
The application I currently work on takes a lot of time to build in Bitrise. Sometimes you have to wait almost 90 min for it to respond. If you are lucky it will build in about 1 hour. It's still a lot, I know.

We needed to do this optimization because of the concurrency-based Plan Deprecation update so we started preparing for it.

I managed to reduce the waiting time by a bit less than half, getting from builds taking about 1 hour to 25 min on average. Without any difficult steps, and without a deep knowledge about pipeline optimizations this was done in around 3 working days including investigation and testing.

Here I'll explain how.

Logo

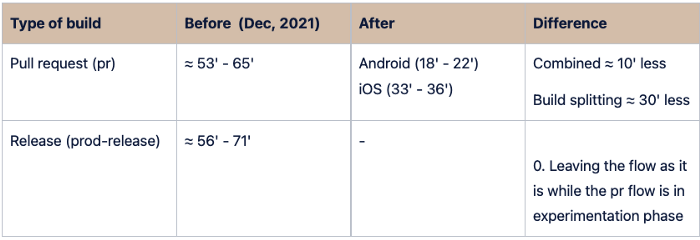
Initial times vs times after improvements

Samples were taken only from the two most used flows. This is some internal documentation I did for my company. Basically, I reduced the time for the pull requests workflow, leaving the workflow for the production release as it is to see how it behaves in the upcoming time. After we find it is stable we'll switch that one too.

Improvements

Improvements done:

  • Enabling caching
  • Using compressed caching
  • Cache updater workflow
  • Splitting Android and iOS workflows.

Enabling caching

Enabling caching for Node modules, Gradle, and Cocoa pods. Although it doesn't seem to improve that much from the previous 53 min, it does a more stable timing since we are not relying on the other servers to download the packages. We have noticed that some days those servers have downtimes and it increases the build times significantly sometimes by more than 30 min. Having them cached ensures a more linear time. To enable caching in the workflows, it is as simple as adding Cache Pull & Cache Push steps in your workflow. More documentation about it here.

Enabling Cache

Compressing cache:

Compressing cache when pushing it to the bucket in order to make the pulling of the cache faster. It made a difference of about 4 min faster than without compression.

To do this is as simple as setting the flag as true in the Cache Push step:

Compressing Cache

Cache updater workflow:

Creating a scheduled flow that will run weekly, this flow will update the cache on a weekly basis to avoid having this process in our "pr" workflow, making it faster since the pr flow will just pull cache, not pushing it which takes about 7 min to 8 min in our case.

In other words:

  • "pr" workflow always pulls cache.
  • This is updated with a scheduled workflow weekly.

How to do this?

You can simply create a flow that builds together Android and iOS and add the Cache Push step at the very end of this flow.

And then you can schedule your workflow to run every certain amount of time, in my case I decided to do it weekly.

Cache updater

Parallel builds, triggering iOS and Android builds in parallel.

Before the process was unified where the builds for Android and iOS were running in the same workflow one after the other. That forces you to wait until one build finishes before you can proceed with the next one.

Having them in two separate workflows has advantages and disadvantages.

Disadvantages

There are some things that run twice as the basic yarn commands. (Linter, ts tests, generating secrets for the bundle & translations). I was trying to re-use this in a general step and then run the single iOS and Android processes but is it not something that I found possible with the current Bitrise capabilities.

Advantages

  • The time was reduced by half.
  • Testers won't have to wait until both builds are complete to start testing.
  • Faster delivery.
  • Gives you a nice feeling of it being pretty fast. (or at least way more than before)

To be able to run parallel workflows you just need to use the step "Start Build"

The way how I did it was by creating a separate workflow that only contains this step and then in this step I'm calling both iOS and Android flows.

Parallel builds

And that's all. That reduced the times by half.

Reduced times

Future improvements I might want to look into:

  • If the capability for parallel steps is improved, ideally the re-use of steps for the independent builds would be great. That would save from 6 min to 7 min in the whole process making it even faster.
  • Look at the specifics for the Android build and the iOS archive process. For example, which optimizations we could do for the archive to be faster? Disable/enabled bitcode?
  • More stuff to put in the cache. Only 3 main things were put in the cache but there are more things that could be put in there.

Conclusions

As you can see, these improvements were not difficult and do not require a deep knowledge about pipeline optimizations. It is important to improve these processes we use every day once in a while, sometimes we don't care about the time it takes because we don't mind waiting but on a bigger scale this makes a huge difference.


Bitrise also posted it in their social media :)